Moving used to only involve relocating your physical belongings. Couches, tables, and lamps all got packed up and sent to your new house. But in today’s high-tech world, what do you do when it comes to moving your smart home goods?
For home automation systems like Nest thermostats, smoke alarms, or security cameras, the moving process takes more than just unplugging and packing them up — there are software systems and personal accounts that need to be reconfigured before they can operate at your new residence. Follow these helpful steps to ensure you properly install or transfer all your Nest products during your move.
If your new location doesn’t have any smart devices, has a different brand of smart device, or doesn’t have as many Nest devices as you’d like, you may want to transfer some (or all) of your old Nest products over.
To get started, you’ll need to remove any existing products from the home to replace them with your Nest devices. If you’re renting your home, make sure you’ve spoken with the landlord and maintenance staff about how to handle the switch. They’ll be able to direct you in properly removing and storing the previous products.
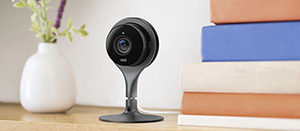
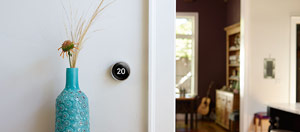
After that’s taken care of, installing your Nest devices will be easy — just follow the set-up videos provided on the support website. The smoke detector and camera systems shouldn’t give you any trouble, but the thermostat may take a little more know-how to set up.
Note: If you don’t feel confident installing any of these systems yourself, get in touch with Nest-trained installation professionals in your area.
With your devices all installed, you’ll next want to add your new home to your Nest account. Nest systems require that you have two homes on your account before you can remove one, so you’ll have to add the new location to your account before removing your old address.
To add a home, open up the Nest app on your laptop or mobile device. Go to the menu button on your home account screen and click the “Add” icon in the upper right corner. The software will walk you through setting up the address of your current home.
Once this is complete, you can remove your old home. Simply go back to the home screen and use the menu icon to choose the previous location. Click on the settings button and choose the “Home Info” tab. Then, select “Remove Home.” This option will only appear on the screen if you have more than one location on your account.
Note: It is important to understand that when you delete the old location from your account, you are also deleting all the systems that have been created at that address. You will need to re-enter all the information if you decide to use your existing smart devices at your new home.
When you’ve got your devices all set up — or if you’ve moved to a home that had built-in Nest devices — and you’ve added your new location, you’ll need to reconnect your products to your Nest account.
To do this, go to the menu icon on the top left corner of the screen and locate the new address. Click on the settings icon and then find the “Add Product” bar. While the Nest Protect and Nest Cam both use a QR scanner to connect, the Nest Thermostat requires you to enter an entry key that shows up on the screen of the thermostat. Once you’ve scanned or entered the identifying codes, the Nest app will take you through a few easy steps for each product to get you quickly connected in your new home.
Note: Before you start adding devices to your account, make sure that you’ve set up the Wi-Fi connection in your home. As with any Internet of Things (IoT) device, you won’t get far without the Internet.
And if you need it, we can help get internet installed in your new home, too!
Photos courtesy of Nest Press Page.